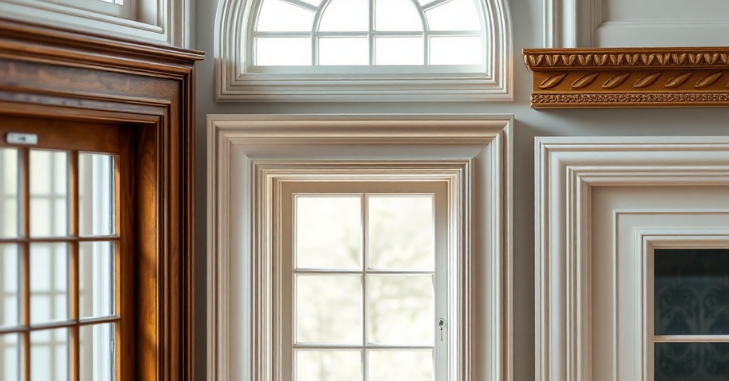
The main window trim styles are Craftsman (flat casings with a thicker head board), Colonial (curved, molded casings with mitered corners), farmhouse (wide, plain boards), modern or minimal (thin square-edged casing or no casing at all) and Victorian (fluted casings with corner and plinth blocks). The best choice depends on your home’s architecture, your ceiling height, the space around each window and whether the trim is inside or outside. You might also like Residential Window Tinting.
Budget matters as much as looks. Primed MDF and finger-jointed pine are the cheapest paint-grade options, PVC is the go-to for exteriors and wet rooms, and stained hardwood or custom-milled profiles sit at the top of the price range. This guide walks through each style, the parts of a trimmed window, a material comparison, cost tiers, a selection checklist and the installation details that separate a crisp job from a sloppy one.
The Parts of Window Trim
Knowing what each piece is called makes it far easier to shop at the lumberyard, read a carpenter’s quote or follow a how-to video:
- Casing: the boards or moldings that frame the sides and top of the window and cover the gap between the window jamb and the wall.
- Head casing (header): the top piece. In many styles it is thicker or wider than the side casings and may carry a cap, crown or small bed molding.
- Stool: the interior ledge at the bottom of the window, which most people call the sill. The true sill is the sloped exterior part of the window frame.
- Apron: the board fixed under the stool. It supports the stool visually and finishes the bottom edge.
- Extension jambs: strips added to the window frame so it sits flush with the wall surface when the wall is thicker than the frame, which is common with 2×6 walls or thick plaster.
- Backband: a small L-shaped molding wrapped around the outer edge of flat casing to add depth and a shadow line.
- Corner and plinth blocks: square decorative blocks at the top corners and base of the casing, used mostly in Victorian work so the boards meet without miters.
There are two basic layouts. Picture-frame trim runs the same casing around all four sides with mitered corners, a clean look common in modern and transitional homes. Stool-and-apron trim uses a projecting ledge and apron at the bottom, which feels more traditional and gives you a usable shelf for plants or small decor. Picture-frame trim is faster to install; stool-and-apron takes more cuts but usually looks more finished in older houses.
Popular Window Trim Styles

1. Craftsman window trim
Craftsman trim uses flat, square-edged boards: typically 1×4 side casings with a wider head board, often a 1×6, that overhangs the side casings slightly and is topped with a thin cap. The head sits on top of the side casings with butt joints, so there are no miters to fuss over. It suits bungalows, Arts and Crafts homes and many newer houses that want a sturdy, honest look. Painted white it reads as fresh and simple; stained oak or fir gives the classic early-20th-century feel. We cover proportions and finishes in depth in our guide to Craftsman-style window trim.

Pro tip: keep the head overhang consistent, usually around 1/2 inch past each side casing, and make the cap overhang the head by the same small amount. Uneven overhangs are the most common giveaway of a rushed Craftsman install.
2. Colonial window trim
Colonial casing has a molded, curved profile, usually around 2-1/4 to 3-1/2 inches wide, joined with mitered corners. Higher-end versions add a backband for a deeper, layered look. It fits Colonial, Cape Cod and Georgian homes, and it is the default builder casing in many American houses because it is widely stocked and inexpensive in primed MDF or pine. Its main weakness is that thin stock casing can look flat in rooms with tall ceilings, which is where a backband or a slightly wider profile earns its place.
3. Farmhouse window trim
Farmhouse trim is essentially a simplified Craftsman look: wide flat boards, often 1×4 or 1×6, with a plain head and a deep stool. It is usually painted white or a soft neutral and pairs well with shiplap, beadboard and plank floors. Some owners use rough-sawn or stained pine for a more rustic feel. Because the boards are plain, small gaps and wavy walls show more than they would behind a molded profile, so take time to scribe and caulk carefully.
4. Modern and minimalist trim
Modern homes favor thin, flat casing, sometimes as narrow as 1×2 or 1×3 with square edges, or no casing at all. A trimless or drywall-return window wraps drywall into the opening and finishes it with corner bead, leaving only a sill or stool. It looks clean but needs a skilled drywall finisher and leaves no margin for an out-of-square window, because there is no casing to hide mistakes. Another modern option is a slim casing painted the same color as the wall so it all but disappears.
5. Victorian and decorative trim
Victorian windows often have fluted or reeded casings with carved rosette blocks at the top corners and plinth blocks at the base. Greek Revival and Federal homes may use a pediment or entablature-style head that adds real height to the opening. These profiles are available as stock kits or can be milled to match originals in older homes. If you are restoring a period house, take a sample of the old casing to a millwork shop; matching an existing profile is usually cheaper than replacing every window’s trim to keep things consistent.
Window Trim Styles Compared
| Style | Profile | Corner joint | Best for | DIY difficulty |
|---|---|---|---|---|
| Craftsman | Flat boards, thick head with cap | Butt joints | Bungalows, traditional and transitional homes | Easy to moderate |
| Colonial | Curved molded casing, optional backband | Miters | Colonial, Cape Cod, most builder homes | Moderate |
| Farmhouse | Wide plain boards | Butt joints | Farmhouse, cottage, rustic interiors | Easy |
| Modern | Thin flat casing or none | Miters or drywall return | Contemporary and minimalist homes | Moderate to hard |
| Victorian | Fluted casing, rosette and plinth blocks | Blocks, no miters | Victorian and period homes | Moderate |
If you are trimming windows yourself for the first time, the butt-jointed styles (Craftsman and farmhouse) are the most forgiving. Miters look simple but open up when walls are out of plane or when the wood shrinks in winter, and a gappy miter is hard to hide.
Materials: Pros, Cons and Where to Use Them
| Material | Relative cost | Strengths | Watch out for |
|---|---|---|---|
| MDF | Lowest | Smooth, stable, paints well | Swells if it gets wet; avoid bathrooms and stools that collect condensation |
| Finger-jointed pine (primed) | Low | Real wood, holds nails well, paint grade | Joints can telegraph through thin paint |
| Clear pine or poplar | Medium | Paints or stains, easy to shape | Poplar has a greenish tint, so it is better painted |
| Hardwood (oak, maple, cherry, walnut) | High | Beautiful stained, very durable | Harder to cut and nail, costly to match |
| PVC or cellular vinyl | Medium to high | Will not rot, ideal outdoors and in wet rooms | Expands and contracts with heat; needs proper fastening and gaps |
| Composite or fiber cement | Medium | Durable exterior option | Heavier, needs specific tools and fasteners |
Inside, most painted trim today is MDF or primed pine, with hardwood reserved for stained work. A practical mix many carpenters use is MDF for side casings and heads, with a primed pine or PVC stool where condensation and potted plants make moisture likely. Outside, PVC and composite trim have largely replaced solid wood on new homes because they resist rot. If you have cedar siding, cedar trim boards stained or painted to match remain a traditional and attractive choice, as long as you keep up with sealing.
Costs: Budget, Mid-Range and High-End

Prices change with lumber markets and region, so treat these tiers as relative rather than exact quotes:
- Budget: stock Colonial casing or flat MDF boards. Materials for a typical window often come in well under $100, and a DIYer with a miter saw can trim several windows in a day.
- Mid-range: primed pine or poplar Craftsman builds with a stool, apron and head cap. There are more pieces and more labor, but the work is very achievable for a confident DIYer.
- High-end: stained hardwood, custom-milled profiles or Victorian blocks. Expect higher material costs and professional finish carpentry; installed costs per window can reach several hundred dollars.
Labor is usually the larger share of a professional job, and it scales with the number of pieces per window rather than the board price. A picture-frame Colonial casing is four cuts and four pieces; a full Craftsman build with stool, apron, head and cap can be eight or more. If you are getting quotes, ask whether the price includes extension jambs, caulking and paint, since these are often listed separately.
Paint is part of the budget too. Semi-gloss or satin enamel is standard for trim because it stands up to cleaning and fingerprints. Our guide on how to paint trim covers prep, caulking and getting crisp lines against the wall.
How to Choose the Right Window Trim Style
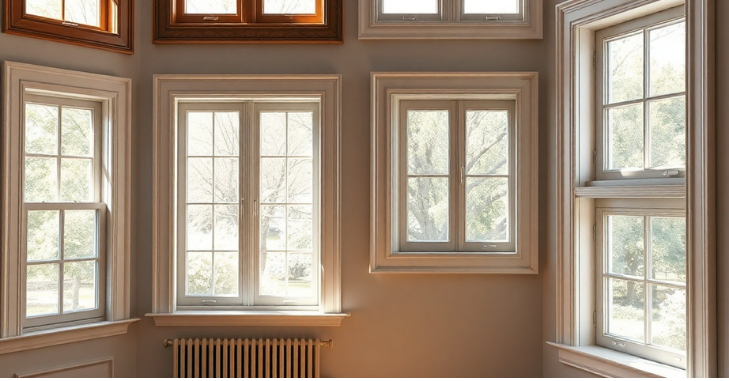
- Match the architecture. Colonial homes suit molded casing, bungalows suit Craftsman, and contemporary homes suit minimal profiles. Mixing a heavy Victorian casing into a ranch house tends to look out of place.
- Coordinate with door trim and baseboards. Window and door casings are usually identical, and baseboard height should look proportionate to casing width. Change one and you will probably want to change all three.
- Consider ceiling height. Tall ceilings can carry wider casings and a built-up head; low ceilings look better with slimmer trim. Heavy trim should work with any crown molding rather than compete with it.
- Check wall space. Windows close to a corner, a cabinet or another window may not fit a wide casing. Measure the gap before you buy.
- Decide paint or stain first. Stain-grade trim needs clear wood and tighter joints, which raises both material and labor cost.
- Think about the room’s use. Kitchens and bathrooms call for moisture-tolerant materials, and a deep stool is handy in kitchens and kids’ rooms.
Common mistakes to avoid
- Using a casing that is narrower than the door trim in the same room, which makes windows look like an afterthought.
- Running MDF stools over radiators or in steamy bathrooms, where they swell and crack the paint.
- Skipping the reveal, so the casing edge lines up exactly with the jamb and every small irregularity shows.
- Choosing a trimless look for windows that were not installed square and plumb.
Installation Tips for DIYers
- Mark a consistent reveal of about 3/16 to 1/4 inch on the window jamb so the casing sits back slightly from the jamb edge; it hides small irregularities.
- Check that the jamb is flush with the drywall. If not, add extension jambs or plane down high spots before trimming.
- Seal the gap between window and framing with low-expansion foam before trimming. The trim itself is not an air seal.
- Install the stool first on stool-and-apron windows, then the side casings, then the head and finally the apron.
- Use wood glue on miters and a brad nailer (18 gauge for casing, 15 or 16 gauge into framing for thicker boards).
- Cut test miters on scrap first and adjust the saw a fraction of a degree if the joint opens at the heel or toe.
- On exterior trim, use flashing above the head casing and caulk joints with a paintable exterior sealant so water cannot get behind it.
Maintenance and Longevity
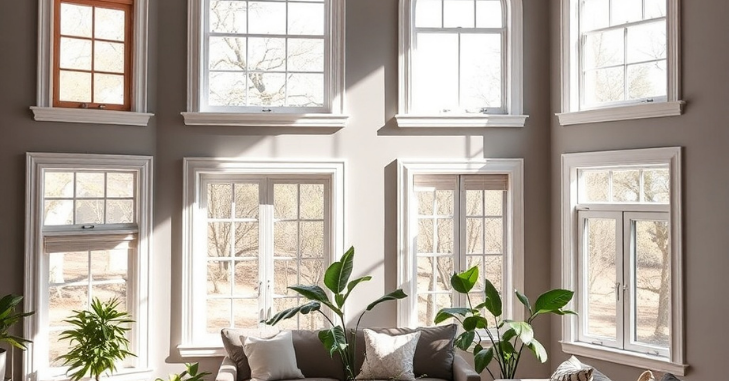
Interior painted trim mainly needs a wipe-down and occasional touch-ups. Keep an eye on window stools, where condensation can soften MDF or peel paint; a bead of fresh caulk and a coat of enamel each few years keeps them sound. Outside, inspect caulk joints yearly and repaint wood trim before bare wood shows. Soft spots at the bottom of casings and on the sill are the first sign of rot, and catching them early often means replacing a single board instead of the whole surround. PVC trim needs only cleaning, though joints may open slightly with temperature swings.
Trim can also frame larger design moves such as architectural artistry on ceilings. For related projects, read How To Cut Drywall? Step-by-Step Techniques for Clean, Precise, and Efficient Drywall Cutting Every Time or browse our Interior Design category.
Bottom Line on Window Trim Styles
Start with your home’s architecture, then match window casing to your door trim and baseboards. For most houses that means Colonial casing or a Craftsman-style flat build in primed MDF or pine, with PVC for exteriors and wet rooms. Save hardwood and custom profiles for rooms where the trim is a feature, and spend the extra time on reveals and joints, because careful installation does more for the finished look than an expensive profile.
Frequently Asked Questions
What is the most popular window trim style?
Colonial casing is the most common style in American builder homes because it is cheap and widely stocked. In renovations, Craftsman and farmhouse flat trim have become very popular because they look substantial and are easy to install with butt joints.
Which window trim style suits modern homes best?
Thin, square-edged flat casing or a trimless drywall return with a simple sill suits contemporary homes best. Both keep lines clean, but the trimless option needs a square window installation and skilled drywall work.
How wide should window casing be?
Most interior casing is about 2-1/4 to 3-1/2 inches wide, while Craftsman and farmhouse builds often use 1×4 boards. Wider casing suits tall ceilings and larger windows, and it should match your door trim.
Is MDF or wood better for window trim?
MDF is cheaper and paints smoothly but can swell when wet. Primed pine or poplar costs a little more and handles moisture and nails better, so many installers use wood for the stool and MDF for the casings.
What is the best exterior window trim material?
PVC and composite trim resist rot and need little upkeep, which is why they dominate new construction. Cedar is a traditional wood option that looks great but needs regular sealing or paint.
Can I install window trim myself?
Yes, especially butt-jointed Craftsman or farmhouse styles, which need only a miter saw, a level, a brad nailer and some patience. Mitered and Victorian styles take more precision, so practice joints on scrap first.