A mini split installation can add efficient heating and cooling without building new ductwork. The system works especially well for additions, garages, older houses, and rooms with uneven temperatures. Proper sizing, electrical work, drainage, and refrigerant handling are essential for reliable performance.
Quick answer: A typical installation connects an indoor air handler to an outdoor condenser through refrigerant lines, wiring, and a drain. Professional single-zone projects commonly cost about $2,000 to $5,500 in the United States. Complex electrical work, extra zones, longer line sets, and difficult access can raise the total.
| Key question | Practical answer |
|---|---|
| Typical single-zone installed cost | About $2,000–$5,500 |
| Common project time | Often one working day for a straightforward single-zone job |
| Ductwork required? | No |
| Main equipment | Indoor air handler and outdoor condenser |
| Professional refrigerant work needed? | Yes, when work opens or alters the refrigerant circuit |
| Common extra costs | Electrical upgrades, permits, longer lines, pumps, wall repairs |
| Best applications | Additions, garages, older homes, isolated rooms, supplemental comfort |
Key Takeaways
- Correct equipment sizing matters more than choosing the largest available unit.
- A dedicated electrical circuit and outdoor disconnect are commonly required.
- Refrigerant work may require an EPA Section 608-certified technician.
- Drainage needs a reliable path away from the indoor unit.
- Single-zone professional installations commonly start in the low thousands.
- Homeowners should compare itemized contractor quotes rather than headline prices.
- Federal home energy tax credits that applied to heat pumps ended after December 31, 2025.
Mini Split Installation Cost in the United States
Professional pricing varies widely because homes and project scopes differ. Current national guides typically place straightforward single-zone projects between $2,000 and $5,500. Multi-zone systems can reach $9,000, $12,000, or more as additional indoor units are added.
Your quote may also include work that basic equipment prices ignore. Electrical circuits, permits, condensate pumps, line-set extensions, and difficult wall access increase labor and material costs. Higher local wages can also raise the final amount.
| Project scope | General U.S. planning range |
|---|---|
| Single zone | $2,000–$5,500 |
| Two zones | About $4,500–$9,500 |
| Three zones | About $6,500–$12,000 |
| Four zones | About $8,500–$16,000 |
| Condensate pump or difficult drain | Often several hundred dollars extra |
| Added electrical work | Can add hundreds or more |
These figures should support budgeting rather than replace a local proposal. Contractors may define their scopes differently, making two similar totals difficult to compare. Ask each installer to identify equipment, electrical work, permits, lines, drains, startup, and warranties.
Homeowners comparing ductless heating with another system can also review Renovixa’s furnace replacement guide. It explains replacement costs and several factors that affect traditional heating projects.
How the Installation Process Works
A ductless system may look simple once it’s installed, but several technical tasks happen behind the scenes. The indoor and outdoor units must be positioned correctly and connected through the building envelope. The installer must then verify electrical, drainage, refrigerant, and operating conditions.
1. Calculate the Heating and Cooling Load
Start by determining how much capacity the room or home needs. Square footage provides a rough starting point, but it cannot account for every condition. Insulation, windows, ceiling height, sun exposure, climate, and air leakage also affect load.
Oversizing can create comfort and humidity problems despite having extra capacity. Undersizing can leave equipment running for long periods without meeting demand. A professional load calculation gives the contractor a stronger basis for equipment selection.
2. Choose the Indoor Unit Location
The air handler needs enough open space for airflow across the room. Avoid hiding it behind tall furniture, cabinets, curtains, or other obstructions. The mounting location should also allow practical access for filter cleaning and future service.
The wall must safely support the mounting plate and equipment. Installers also consider the route for refrigerant tubing, communication cable, and condensate drainage. A shorter and cleaner route can reduce installation complexity.
3. Select a Suitable Outdoor Location
The condenser needs stable support and adequate surrounding airflow. Installers commonly use a ground pad or a wall-mounted bracket appropriate for the equipment. The exact clearances should follow the manufacturer’s installation instructions.
Consider drainage, snow, vegetation, and future maintenance access when selecting the position. Avoid locations where debris can regularly block airflow. The unit should also remain accessible for cleaning and service.
4. Plan the Wall Penetration and Line Route
The indoor and outdoor equipment connect through a relatively small opening in the wall. This opening carries the refrigerant lines, control wiring, and often the condensate drain. Careful routing helps protect the system and keeps the finished installation tidy.
The penetration also needs proper sealing against water and uncontrolled air leakage. Moisture management is especially important around exterior openings. Renovixa’s house wrap guide explains why exterior water-control layers and penetrations require careful detailing.
5. Mount the Indoor Air Handler
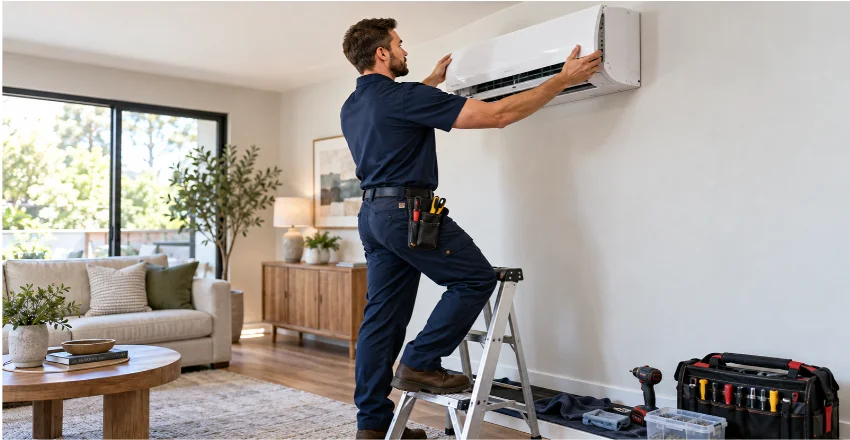
The installer secures the mounting plate level to appropriate framing or approved anchors. The indoor unit then attaches to this support after its connections are routed. A level installation also helps condensate move toward the intended drain.
Poor mounting can create noise, drainage trouble, or an uneven appearance. The unit should fit firmly without unnecessary movement. Installation instructions from the equipment manufacturer should control mounting details.
6. Install the Outdoor Condenser
The outside equipment is positioned on its prepared base or bracket. Proper support keeps the cabinet stable and helps limit unwanted vibration. The installer also preserves the required service and airflow clearances.
The refrigerant tubing is routed toward the condenser without unnecessary bends or damage. Exposed lines usually receive protective covering after installation. Outdoor wiring and disconnect equipment must also suit the application.
7. Complete Electrical Connections
Ductless systems generally need an electrical supply sized for the selected equipment. The required voltage and circuit size vary by model. A dedicated disconnect near the condenser is common in residential installations.
Electrical work must follow the equipment instructions and applicable codes. Homeowners who are not qualified for this work should hire an electrician. Electrical upgrades can become a meaningful part of the project cost.
8. Connect, Test, and Commission the Refrigerant Circuit
This stage is one reason a standard system is not an ordinary DIY appliance. EPA rules require Section 608 technician certification for activities that can open or affect a regulated refrigerant circuit. The EPA specifically includes connecting certain pre-charged lines and adding or removing refrigerant.
A qualified technician follows the manufacturer’s procedure for the refrigerant connections. The completed system is checked for leaks and prepared according to equipment requirements. Correct commissioning protects performance and helps prevent refrigerant problems.
9. Verify Drainage and System Operation
The indoor coil creates condensation during cooling, so water needs a dependable exit path. Gravity drainage is preferred where the building layout allows it. A condensate pump may be needed when water cannot drain naturally.
The installer should test heating, cooling, airflow, controls, and drainage before leaving. Strange noises, leaking water, error codes, or weak temperature changes need investigation. Keep the installation paperwork and equipment information for future service.
Can You Install One Yourself?
Homeowners can perform some planning and preparation without touching the refrigerant circuit. You may be able to choose potential locations, clear access, prepare an approved pad, or coordinate wall finishing. Your role depends on the product, local rules, and your electrical experience.
Refrigerant work creates a clear legal boundary. EPA guidance says Section 608 certification is required for work that can violate the refrigerant circuit’s integrity. That includes certain hose connections and adding or removing refrigerant.
Some products are specifically marketed for homeowner installation with specialized connection systems. That label does not override electrical codes, permits, manufacturer conditions, or federal refrigerant requirements. Review the instructions and local requirements before assuming the entire project is DIY-friendly.
Permits, Electrical Work, and Local Codes
Permit rules depend on the state, city, county, and exact project scope. HVAC work may trigger mechanical permits, while a new circuit can require electrical approval. Local authorities can tell you which inspections apply at your address.
A contractor’s quote should identify whether permits are included. Ask who will obtain them and who handles corrections if an inspection finds a problem. Avoid assuming a small ductless unit is automatically permit-free.
A garage conversion can involve several trades at once. Renovixa’s garage conversion cost guide covers HVAC, insulation, electrical, and other expenses that can accompany those projects.
What About Rebates and Federal Tax Credits?
Incentives deserve careful checking because older articles may no longer reflect current law. The federal Energy Efficient Home Improvement Credit previously covered qualifying heat pumps under Section 25C. IRS instructions now state that the credit cannot be claimed for property placed in service after December 31, 2025.
That change does not mean every incentive has disappeared. State, local, manufacturer, or utility programs may still apply in some locations. Verify a current program directly before including an incentive in your project budget.
Do not choose an oversized or unsuitable system simply because a rebate promotes it. Equipment selection should begin with the home’s needs. Incentives should reduce the cost of an appropriate project rather than determine the design.
How to Compare Contractor Quotes
Ask at least two or three qualified contractors to quote the same project scope. A detailed proposal is more useful than a low total with missing information. Confirm model numbers, capacity, line length, electrical work, permits, drainage, startup, labor warranties, and equipment warranties.
Look closely at exclusions because they can change the final price. Wall repair, painting, panel upgrades, structural supports, and unusually long tubing routes may be separate. Ask contractors to identify likely extras before work begins.
Price should not be your only comparison point. Licensing, insurance, installation experience, warranty support, and clear communication also matter. A well-defined quote reduces the chance of disputes after work starts.
Common Installation Mistakes to Avoid
Several problems begin before the equipment is switched on. Poor sizing, blocked airflow, weak mounting, and careless line routing can undermine an expensive system. Drainage mistakes may also cause water damage inside finished rooms.
Exterior penetrations deserve equal attention. Water should not have a path into framing around tubing or wiring. Renovixa’s moisture barrier guide explains how water, vapor, and air movement require different control strategies.
Commissioning should never be treated as an optional final detail. The technician should verify operation instead of assuming factory-new equipment works perfectly. Keep records showing what was installed and how the system was tested.
When Professional Installation Makes the Most Sense
Professional installation is usually the safest choice for standard split equipment. It is especially sensible when the project needs refrigerant work, a new electrical circuit, permits, multiple zones, or difficult wall access. Professional help also reduces the number of technical responsibilities placed on the homeowner.
A contractor can coordinate sizing, equipment selection, electrical requirements, drainage, and commissioning as one project. That coordination becomes more valuable as the system grows beyond one room. Multi-zone designs also require careful capacity allocation between indoor units.
For bathrooms or other moisture-heavy spaces, heating and cooling should not replace proper exhaust ventilation. Renovixa’s bathroom fan installation guide covers dedicated ventilation considerations for those rooms.
Frequently Asked Questions
How much does mini split installation cost?
A professional single-zone project commonly costs about $2,000 to $5,500 in the United States. Multi-zone projects can cost considerably more because they add indoor equipment, labor, controls, and longer connections. Electrical changes and difficult access can also increase the quote.
How long does installation take?
A straightforward single-zone project can often be completed within one working day. More complicated jobs may take longer because of electrical upgrades, multiple indoor units, difficult routing, or permits. Ask the installer for a schedule based on your exact scope.
Do ductless systems need electrical work?
Most systems require a suitable electrical supply and disconnect. Circuit requirements depend on voltage, amperage, and the specific equipment. An electrician may be necessary when the existing panel or wiring cannot support the new load.
Can a homeowner handle the refrigerant lines?
Homeowners should not assume refrigerant work is unrestricted. EPA rules require Section 608 certification for covered activities that can affect the refrigerant circuit. Use a qualified technician whenever the installation procedure falls within those requirements.
Does a ductless system need a condensate drain?
Cooling produces moisture at the indoor coil, so the system needs a drainage method. Many installations use gravity to move condensate outdoors or to another approved location. A pump can be necessary when gravity drainage is not practical.
Is a ductless system good for a garage conversion?
It can be a practical option because it does not require extending an existing duct network. The garage still needs proper insulation, air sealing, and correctly sized equipment. Local requirements may also apply when converting unfinished space into habitable space.
Plan the Project Before Buying Equipment
A successful installation starts with sizing and site planning rather than an equipment sale. Determine the rooms you want to condition, electrical limitations, outdoor location, drainage route, and required permits. Then compare itemized proposals built around the same project scope.
Professional installation costs more than an equipment-only purchase, but it covers work that directly affects reliability and safety. Refrigerant handling, electrical connections, drainage, and commissioning deserve particular attention. Get written quotes from qualified local contractors before ordering a system that may not suit your home.