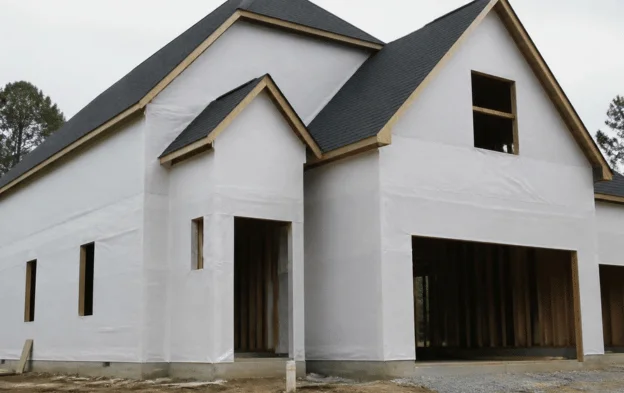
House wrap is a protective layer installed over exterior wall sheathing and behind siding or other cladding. Its main purpose is to help keep rain from reaching vulnerable framing and sheathing while giving incidental moisture a path to escape. A correctly detailed system can also help control unwanted air movement through exterior walls.
| Key question | Practical answer |
|---|---|
| What is it? | A water-resistive barrier, often called a WRB |
| Where does it go? | Over exterior sheathing and behind the cladding |
| Main purpose | Manage rainwater that gets behind siding. |
| Is it insulation? | No, although better air control can support energy performance. |
| Is it a vapor barrier? | Usually no; the two layers perform different jobs. |
| Code issue | U.S. model codes generally require an approved WRB for exterior wall assemblies, subject to local adoption and exceptions. |
| Typical 2026 installation cost | Roughly $0.50–$1.50 per square foot for many standard installations, with some siding projects reaching higher |
Direct answer: A water-resistive wall membrane sits over exterior sheathing and behind cladding. It catches rain that gets past siding, then directs that water toward the exterior. When seams, edges, and penetrations are sealed according to product instructions, the same layer may also contribute to the home’s continuous air-control system.
Key takeaways
- Exterior siding is the first defense against rain, but the WRB provides a second drainage layer behind it.
- The membrane must work with flashing around windows, doors, vents, pipes, and wall transitions.
- A WRB, vapor retarder, air barrier, and insulation are not automatically the same thing.
- Correct laps and flashing details matter as much as the material itself.
- Local building codes and manufacturer instructions should guide the final installation.
- Re-siding is often the most practical time to inspect, repair, or replace the existing exterior barrier.
How House Wrap Works in an Exterior Wall
Exterior cladding is designed to shed most rain, but water can still move behind siding through joints, gaps, and wind-driven exposure. The WRB creates a drainage plane between that cladding and the more moisture-sensitive layers of the wall. Water reaching this plane should move downward and return to the exterior rather than entering the wall cavity.
The membrane also needs to support drying because moisture can reach walls from more than one direction. Many synthetic products resist bulk liquid water while allowing water vapor to pass through at a controlled rate. That balance helps reduce the chance that incidental moisture remains trapped against wood sheathing or framing.
WRB, Vapor Barrier, and Air Barrier: Know the Difference
Homeowners often use moisture-control terms as though they describe the same material. They do not, and confusing their functions can lead to a poorly designed wall assembly. Renovixa’s guide to Hardwood Decking explains how the correct layer depends on the source and movement of moisture.
| Layer | Primary job | Typical concern |
|---|---|---|
| Water-resistive barrier | Controls bulk rainwater | Water getting behind exterior cladding |
| Vapor retarder | Slows vapor diffusion | Climate-dependent vapor movement |
| Air barrier | Limits uncontrolled airflow | Drafts and moisture carried by moving air |
| Insulation | Reduces heat flow | Heating and cooling performance |
A single product can sometimes perform more than one function, but only when the complete assembly and installation support those functions. U.S. Department of Energy building guidance notes that exterior housewrap can function as an air barrier when joints and edges are sealed, and the material is correctly integrated with flashing. Simply stapling a sheet to the wall does not create a continuous air-control layer.
Is a Water-Resistive Barrier Required by Code?
The 2024 International Residential Code requires a weather-resistive exterior wall envelope and addresses water-resistive barriers in Section R703.2. The section calls for at least one approved WRB layer over studs or sheathing on exterior walls, with specified exceptions. Local jurisdictions can adopt, amend, or use different code editions, so your local requirements still need to be checked.
The IRC also shows why installation details cannot be treated as optional finishing touches. For No. 15 felt and qualifying ASTM E2556 barriers, horizontal courses are installed with the upper layer overlapping the lower by at least two inches. Joints require at least six inches of overlap, creating a shingle-style drainage path that directs water downward.
Installation Details That Make the Difference
The basic principle is simple: every layer should direct water down and out. Windows, doors, roof-to-wall connections, utility penetrations, decks, and material transitions interrupt the drainage plane. Flashing at those locations must connect with the WRB rather than creating a path behind it.
Before siding covers the wall, check these six details:
- Upper courses overlap lower courses instead of being tucked behind them.
- Tears and unnecessary holes have been repaired with compatible materials.
- Seams are treated according to the membrane manufacturer’s instructions.
- Window and door flashing drains onto the exterior drainage plane.
- Pipes, vents, electrical boxes, and other penetrations are properly detailed.
- The material is not left exposed longer than its manufacturer allows.
Windows and doors deserve special attention because each opening interrupts the continuous drainage plane. Federal Building America guidance recommends properly lapped sill, side, and head flashing that integrates with the wall’s drainage layer. A visually tidy installation can still leak if those pieces are sequenced in the wrong order.
What Does Installation Cost in the United States?
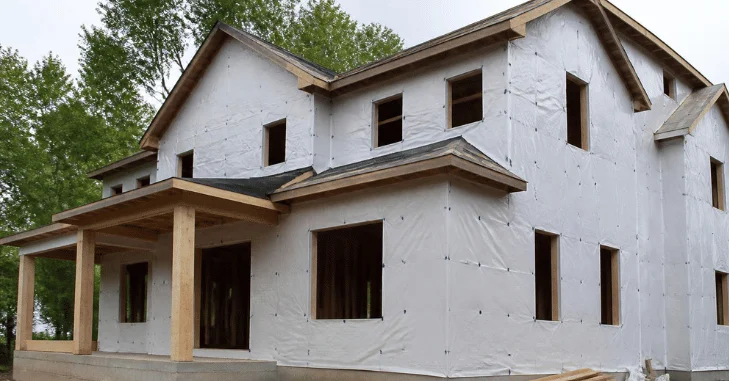
Pricing varies with wall area, building height, labor rates, membrane type, accessibility, and the number of openings that need flashing. Current 2026 consumer cost guides often place standard WRB installation near $0.50 to $1.50 per square foot. Some siding-related projects report costs approaching $2 per square foot when the barrier is included as part of larger exterior work.
Those figures do not mean a 2,000-square-foot home has exactly 2,000 square feet of wall to cover. Wall height, gables, additions, doors, windows, waste, and architectural complexity change the required material and labor. Ask contractors to separate the barrier, flashing, fasteners, wall repairs, siding removal, and new cladding in their estimates.
Choosing the Right Exterior Barrier
The correct product depends on the wall system rather than brand recognition alone. Standard mechanically fastened sheets suit many residential projects, while drainable products can create additional drainage space behind certain claddings. Self-adhered membranes and integrated sheathing systems provide other approaches where the design or performance goals justify them.
| WRB approach | Main advantage | Consider before choosing. |
|---|---|---|
| Mechanically fastened synthetic sheet | Familiar and widely available | Seams, tears, and penetrations need careful detailing. |
| Drainable membrane | Helps create a drainage path | Cost and cladding requirements vary. |
| Self-adhered membrane | Fewer fastener penetrations in the field | Surface preparation and compatibility matter. |
| Integrated sheathing system | Combines sheathing and WRB functions | Joint treatment is critical |
| Asphalt felt | Established material with code-recognized applications | Installation and cladding requirements must match the assembly. |
Do not choose a product based on permeability or price alone. Check its approved use, exposure limit, fastening pattern, flashing compatibility, and installation instructions. Climate, siding type, exterior insulation, and the wall’s drying potential can all affect the final specification.
What About an Older Home With No Visible WRB?
You usually cannot confirm the entire drainage layer from inside a finished house. In many existing homes, accessing it means removing exterior cladding, which makes a siding replacement project a logical time for inspection. Contractors can then check the sheathing for staining, decay, previous leaks, damaged flashing, and missing barrier sections.
Moisture found elsewhere in the home may have a different source and should not automatically be blamed on an exterior membrane. Below-grade water needs a different diagnosis, as Renovixa explains in its Gutter Splash Guard guide. Ground moisture beneath a home also requires a separate strategy, covered in the guide to Can You Paint Vinyl Siding.
Common Mistakes to Avoid
Many failures come from details rather than from the sheet material itself. A premium membrane cannot compensate for water being directed behind it at a window, roof intersection, or penetration. Inspect the drainage path as a connected system rather than judging the project by whether the walls appear fully covered.
Common problems include:
- Installing laps backward so water can run behind the lower sheet.
- Leaving damaged or wind-torn areas unrepaired.
- Relying on ordinary tape that is not compatible with the membrane.
- Treating the WRB as a substitute for window or door flashing.
- Leaving gaps around pipes, vents, fixtures, and electrical penetrations.
- Assuming a water-control layer automatically acts as a vapor barrier.
- Covering damaged or wet sheathing before addressing the cause.
- Ignoring the membrane manufacturer’s exposure and fastening requirements.
A practical inspection starts at the top of an opening and follows the expected path of a raindrop. Each upper component should direct water onto the layer below it, with the final path leading outside. If a flashing edge sends water behind another layer, the assembly needs correction before siding hides the detail.
When Professional Review Makes Sense
A careful DIYer may be able to inspect visible laps, tears, and simple seams during a small project. Complex openings, multi-story walls, stucco assemblies, exterior insulation, masonry veneers, and recurring water damage deserve more technical review. A qualified contractor or building-envelope professional can evaluate the full wall instead of treating one visible symptom.
Professional assessment becomes more useful when moisture has already damaged sheathing or framing. Repeated water entry can also connect with foundation, grading, or drainage problems rather than a single exterior-wall defect.
Frequently Asked Questions
Is house wrap required behind vinyl siding?
An approved water-resistive barrier is generally required behind exterior wall cladding under modern IRC-based construction, although local code adoption and exceptions vary. Vinyl siding itself should not be treated as the complete water-control system. Confirm the applicable code and siding manufacturer instructions for your project.
Does the membrane make a home waterproof?
No exterior wall assembly should depend on one sheet to make the building completely waterproof. The WRB works with siding, flashing, windows, doors, drainage details, roofing connections, and other components. Failure at one transition can allow water to bypass an otherwise correctly installed membrane.
Can it improve energy efficiency?
It can help when the product is detailed as part of a continuous air barrier. Reducing uncontrolled air leakage can help insulation perform closer to its intended level and can reduce drafts. The seams, edges, penetrations, and transitions must be sealed correctly for that air-control function to work.
Can you install a new exterior barrier over an existing one?
Sometimes a renovation allows an approved new WRB system to be installed as part of the rebuilt wall, but the existing assembly must be evaluated first. Damaged sheathing, trapped moisture, incompatible materials, and local code requirements can change the correct approach. Follow the selected product’s instructions rather than assuming another layer is always beneficial.
Check the Wall Before the Siding Hides It
The best time to evaluate the exterior drainage plane is before new siding covers it. Check the laps, flashing, openings, penetrations, sheathing condition, and product instructions while everything remains visible. If you are planning a major exterior renovation, document those details with photos and ask the installer how the wall will drain water at every interruption.