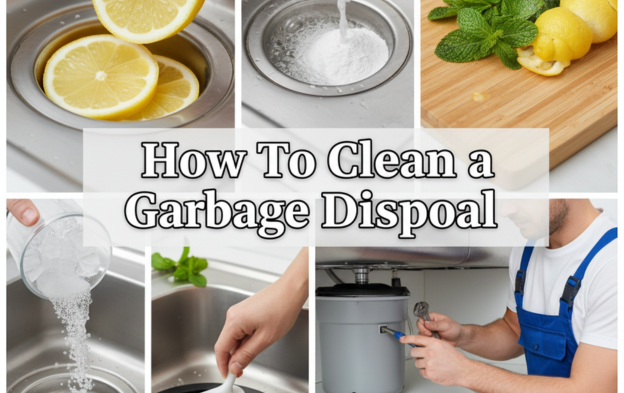
To clean a garbage disposal, cut the power, scrub the rubber splash guard with dish soap and an old toothbrush, pour in 1/2 cup of baking soda followed by 1 cup of white vinegar, let it fizz for 5 to 10 minutes and flush with hot water. Then run a handful of ice cubes and coarse salt through the unit with cold water to scour the grinding chamber, and finish with a few citrus peels for a fresh smell.
That routine takes about 15 minutes and fixes most odor and slow-drain problems. Below you will find how often to clean, the tools you need, a detailed step-by-step process, quick fixes for stubborn smells, what never to put down a disposal, and the signs that it needs a plumber or a replacement rather than another cleaning.
Garbage Disposal Cleaning Methods Compared
| Method | What you need | What it does | Best for | Mistake to avoid |
|---|---|---|---|---|
| Baking soda and vinegar flush | 1/2 cup baking soda, 1 cup white vinegar | Loosens grime and neutralizes odors | Weekly deep clean | Skipping the hot-water rinse afterward |
| Ice and coarse salt | 2 cups ice cubes, 1/2 cup rock salt | Scours the grinding chamber and impellers | Removing stuck-on residue | Using ice alone, which scrubs less |
| Splash guard scrub | Dish soap, old toothbrush, gloves | Removes the film that causes most smells | Weekly, or whenever it smells | Cleaning only the top side of the flaps |
| Citrus peels | Lemon, lime or orange peels, cut small | Quick deodorizing | Between deep cleans | Dropping in whole peels or too many at once |
| Commercial cleaner pods | Store-bought foaming tablets | Convenient foaming clean | Busy households | Relying on them instead of scrubbing the guard |
| Plumber service | Professional tools | Clears clogs, fixes leaks and jams | Persistent odor, clogs, noises | Waiting until water backs up into the sink |
Why Cleaning Your Garbage Disposal Matters
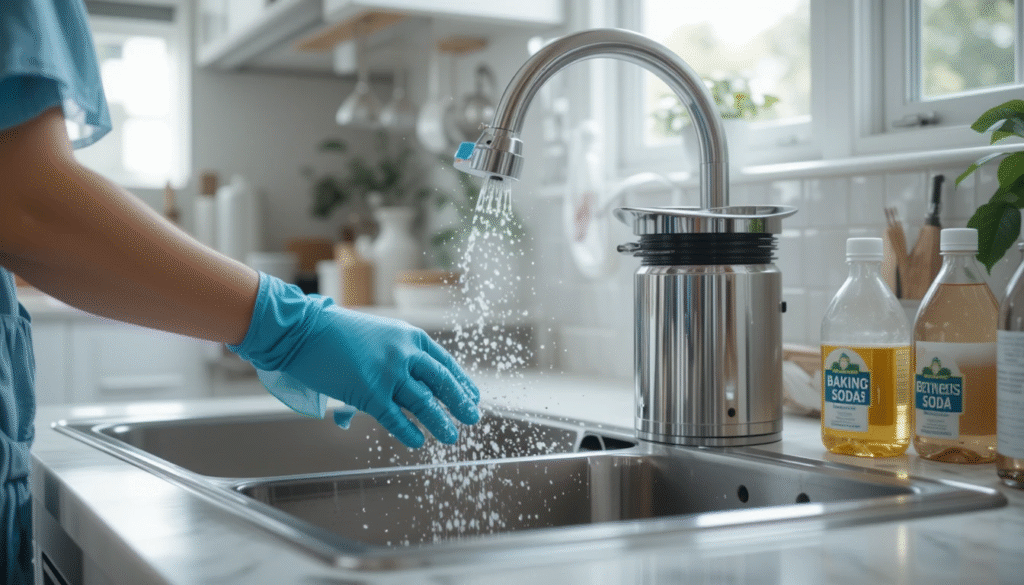
Many people assume a disposal cleans itself because it grinds food. It does not. Food particles, grease and soap scum stick to the underside of the splash guard, the walls of the grinding chamber and the drain line, where bacteria thrive. Left alone, that buildup leads to:
- Persistent sour or rotten smells from the sink
- Slow drainage or full clogs in the drain line
- Reduced grinding performance as residue coats the chamber
- Mold and mildew on the rubber splash guard
- Extra strain on the motor and a shorter appliance lifespan
A few minutes of routine care prevents these problems and can save you a service call or an early replacement.
How Often Should You Clean a Garbage Disposal?

| Task | How often | Time needed |
|---|---|---|
| Run cold water before, during and after each use | Every use | Seconds |
| Citrus peels or ice for a quick freshen | Every few days, as needed | 2 minutes |
| Splash guard scrub and baking soda and vinegar flush | Weekly | 10 to 15 minutes |
| Ice and salt scour | Every few weeks | 5 minutes |
| Check under the sink for leaks and loose connections | Every few months | 5 minutes |
Heavy users, such as large families who cook daily, may need the weekly clean more often. If the sink smells within a day or two of cleaning, the problem is likely deeper in the drain, which is covered in the troubleshooting section below.
Tools and Materials Needed

- Household items: baking soda, white vinegar, ice cubes, coarse or rock salt, citrus peels and dish soap
- Cleaning tools: an old toothbrush, a long-handled bottle or scrub brush, a sponge and kitchen tongs or pliers for retrieving objects
- Protective gear: rubber gloves and safety glasses if you use stronger cleaners
- For jams: a flashlight and the hex wrench (Allen key) that came with the disposal
- Optional: commercial garbage disposal cleaner pods or foaming cleansers
Step-by-Step: How to Clean a Garbage Disposal

Step 1: Turn off the power
Before you put a brush, tongs or anything else into the disposal, unplug it under the sink or switch off its breaker. Then flip the wall switch to confirm it does not start. Never put your hand inside the grinding chamber, even with the power off; use tongs to remove any utensils or debris you spot with a flashlight.
Step 2: Scrub the splash guard
The rubber splash guard, the black flaps at the drain opening, is the number one source of disposal odors because food film collects on its underside. Put a little dish soap on an old toothbrush and scrub both sides thoroughly, lifting each flap to reach underneath. Many guards twist or pull out for cleaning; if yours does, wash it in the sink with hot soapy water and refit it. Rinse with warm water.
Step 3: Flush with baking soda and vinegar
- Pour 1/2 cup of baking soda into the drain opening.
- Add 1 cup of white vinegar and let it fizz for 5 to 10 minutes. You can cover the drain with a stopper to keep the foam inside the chamber.
- Restore power if you turned it off at the breaker, then flush with hot tap water for about a minute to rinse away loosened grime.
Step 4: Scour with ice and salt
Drop about two cups of ice cubes and 1/2 cup of coarse salt into the disposal. Turn on the cold water, then switch the disposal on and let it run until the grinding sound stops. The hard ice and salt crystals knock residue off the chamber walls and the impellers, the small swiveling lugs that push food against the grinding ring. Contrary to a common myth, ice does not sharpen anything, since most disposals have no blades, but it is very good at scouring.
Step 5: Freshen with citrus peels
Cut a few lemon, lime or orange peels into small pieces, drop them in, and run the disposal with cold water for 15 to 30 seconds. The oils give a clean scent. Keep it to a handful at a time, because large amounts of peel can be hard for smaller units to grind.
Step 6: Rinse and check
Run cold water for another 30 seconds, then smell the drain. If odors remain, repeat the splash guard scrub, since that is where most lingering smells come from.
DIY Hacks That Actually Help

- Vinegar ice cubes: freeze white vinegar in an ice tray and run a few cubes through the disposal. You get the scouring effect of ice with the deodorizing effect of vinegar.
- Lemon ice cubes: freeze lemon juice or slices with water for a fresher scent than plain ice.
- Dish soap flush: fill the sink with a few inches of warm soapy water, then pull the stopper and run the disposal so the rush of water cleans the chamber and drain line.
- Overnight baking soda: sprinkle a few tablespoons of dry baking soda into the disposal at night and flush with water in the morning to absorb lingering odors.
- Tongs and toothbrush combo: clamp a vinegar-soaked cloth or brush in tongs to reach under the splash guard without putting your fingers near the chamber.
Common Mistakes to Avoid
- Pouring grease or oil down the drain: it coats the chamber and solidifies in pipes. Wipe greasy pans with a paper towel and put it in the trash.
- Grinding with hot water: use cold water while the disposal runs so any fats stay solid and get carried away instead of melting and coating the pipes. Hot water is fine for rinsing after a cleaning flush.
- Using bleach or harsh drain chemicals: they can damage rubber and metal parts and are not needed for routine cleaning. Check your manufacturer’s manual before using any chemical cleaner.
- Pouring boiling water often: repeated boiling water can stress PVC pipes and seals. Hot tap water is enough.
- Grinding fibrous or starchy foods: celery strings, corn husks, onion skins, pasta and rice can wrap around parts or swell into clogs.
- Forgetting the splash guard: cleaning the chamber while ignoring the flaps leaves the main odor source in place.
What Not to Put in a Garbage Disposal
| Avoid | Why |
|---|---|
| Grease, oil and fat | Coats parts and hardens into clogs in the drain line |
| Bones and fruit pits | Too hard for most household units and can jam them |
| Fibrous scraps (celery, corn husks, artichokes) | Strings wrap around the impellers |
| Pasta, rice and bread | Swell with water and form a paste that clogs pipes |
| Coffee grounds and eggshells | Build up as sludge in the drain |
| Non-food items | Can jam or damage the unit |
Troubleshooting Smells, Jams and Slow Drains
- Smell returns quickly: clean the splash guard again and run the dish soap flush. If it persists, the odor may come from the drain trap or line, which a plumber can clear.
- Disposal hums but does not spin: turn off the power, then use the hex wrench in the socket on the bottom of the unit to work the plate back and forth and free the jam. Remove the obstruction with tongs, wait a few minutes and press the red reset button before trying again.
- Disposal will not start at all: press the reset button on the bottom of the unit and check the breaker.
- Water drains slowly: run the disposal with plenty of cold water. If both sides of a double sink back up, the clog is likely in the shared drain line.
If you are not comfortable working under the sink, or the issue involves wiring, call a licensed plumber or electrician.
When to Call a Plumber or Replace the Unit

Cleaning extends a disposal’s life, but it cannot fix worn or broken parts. Consider a plumber or a new unit if you notice:
- Frequent jams or the reset button tripping often
- Loud rattling or metal-on-metal grinding noises
- A foul smell that returns no matter how often you clean
- Water leaking from the body of the unit rather than from a loose connection
- An older unit, especially one past around ten years of regular use
As a rough guide, a new disposal unit often costs about $100 to $350 depending on motor size and features, with professional installation commonly adding around $150 to $300. Prices vary by region and model, so get a written quote before work starts.
Long-Term Maintenance Checklist
- Run cold water before, during and after each use
- Feed scraps in gradually rather than all at once
- Scrub the splash guard weekly
- Do a baking soda and vinegar flush every 7 to 10 days
- Run ice and salt through every few weeks
- Keep grease, fibrous scraps and non-food items out
- Check under the sink for leaks every few months
Final Thoughts on Cleaning a Garbage Disposal
Most disposal odors come from the splash guard and from buildup in the chamber, and both are fixed with a weekly 15-minute routine: power off, scrub the guard, baking soda and vinegar, then ice, salt and citrus with cold water. Pair that with good habits about what goes down the drain and your disposal should stay fresh and working smoothly for years. For more home care guides, see how to remove paint from concrete or browse our Cleaning category.
Frequently Asked Questions
How often should I clean my garbage disposal?
Give it a deep clean once a week with a splash guard scrub and a baking soda and vinegar flush. Freshen it with citrus peels or ice every few days if it is used heavily.
Can I put bleach down my garbage disposal?
It is not recommended for routine cleaning. Bleach can be harsh on rubber and metal parts, and baking soda, vinegar and dish soap clean effectively without the risk. Check your manufacturer’s manual for approved cleaners.
What should never go in a garbage disposal?
Avoid grease, bones, fruit pits, fibrous foods like celery and corn husks, coffee grounds, eggshells, and pasta or rice that swell with water. These can jam the unit, clog pipes and cause odors.
Why does my garbage disposal still smell after cleaning?
The underside of the splash guard is the most common culprit, so scrub it again thoroughly. If the smell persists, food may be trapped in the drain trap or line, which may need a plumber.
Does ice sharpen garbage disposal blades?
No. Most disposals use blunt impellers and a grinding ring rather than blades. Ice and coarse salt are still useful because they scour residue off the chamber and impellers.
Should I use hot or cold water when running a garbage disposal?
Use cold water while grinding so fats stay solid and flush away. Hot water is fine for rinsing after a cleaning flush.